
Disclosure: This post contains affiliate links. As an Amazon Associate, I earn from qualifying purchases.
These extra gooey bakery style S’mores Rice Krispie Treats are the ultimate no-bake summer dessert recipe – perfect for every occasion!
 Check out this S’mores Rice Krispie Treat recipe below or PIN IT for later!
Originally shared June 2012 and updated July 2026
There’s something so nostalgic about that unmistakable snap, crackle, and pop of Rice Krispies. From enjoying a bowl while watching Saturday morning cartoons, to that surprise Rice Krispie Treat in my lunch box, for me, that familiar sound instantly brings back memories.
Another treat that is super nostalgic for me is s’mores. That gooey, toasted marshmallow, melted Hershey chocolate bar and crispy graham cracker, will always take me back to summers spent not only hovering around a campfire while visiting family in the mountains, but also to summers spent at sleepaway camp with friends.
Today, I still love s’mores and s’mores inspired treats (like this Chocolate Chip Cookie Dough S’mores) just as much as I did back then and have recently combined them with that other classic childhood treat – Rice Krispie Treats!

But these aren’t the dry, dense treats you may remember from school bake sales. They’re incredibly soft, wonderfully buttery, loaded with not only gooey marshmallows, but those crispy graham crackers and rich Hershey chocolate bars for the ultimate no bake summer dessert – S’mores Rice Krispie Treats!
Yes, these gourmet Rice Krispie Treats are chewy, gooey, and melt in your mouth. They taste like everything I loved about my childhood summers and best of all, they’re one of the easiest desserts you will make – no oven or campfire required!
Whether you’re hosting a backyard barbecue, packing treats for a picnic at the park, or simply craving a nostalgic dessert after dinner, these bakery-style homemade S’mores Rice Krispie Treats are guaranteed to become a family favorite.

Helpful Tips and Information:
S’mores Rice Krispie Treats Ingredients and Substitutions:
(A full list of ingredients, plus specific measurements, can be found in the recipe card below.)
- Cooking spray – We recommend a neutral flavored cooking spray like a avocado oil or canola oil spray. This helps prevent the rice crispy treats from sticking to your pan and to your hands/spatula as you press the treats into the pan.
- Crispy rice cereal – We recommend fresh, name brand Rice Krispies in this recipe for a true gourmet Rice Krispie Treat. However, you could replace all or some of the Rice Krispies with Golden Graham cereal.
- Graham crackers – We used crushed graham crackers for that classic s’mores flavor, however, you could substitute the broken crackers with Golden Grahams cereal.
- Unsalted butter – For this Rice Krispie Treat recipe you will be browning the butter. This helps add a nice nutty flavor to the treats, reminiscent of toasting the marshmallows over a fire. We prefer unsalted butter so that we have more control over the amount of added salt.
- Mini marshmallows – The secret to the best Rice Crispy Treats is using fresh, name brand marshmallows and a lot of them. I find the mini marshmallows not only melt better and more quickly (as opposed to the large ones), I like to stir in a few extra marshmallows at the end that don’t always completely melt. This helps the treats be extra soft and gooey. For decoration, we “toasted” a few mini marshmallows with a kitchen torch and pressed them in the top at the end, but that’s optional.
- Kosher salt
- Vanilla extract – Pure vanilla extract enhances the marshmallow flavor and gives the treats that rich, gourmet taste you’d expect from a bakery.
- Chocolate chips – You could omit these and replace them with extra chopped up Hershey Bars, if desired.
- Hershey Milk Chocolate Bars

Frequently Asked Questions
Why are my Rice Krispie Treats hard?
The most common reason is using stale marshmallows and cereal. We highly recommend using fresh, never opened marshmallows and cereal, not the stuff that’s been sitting in your pantry for months.
Another common reason is overheating the marshmallows. Marshmallows contain sugar that begins to harden when cooked too long. Melt the marshmallows slowly over low heat and remove the pan just as soon as they’re smooth and melted. Some small un-melted lumps of marshmallows are perfectly fine and help give the cereal treats a softer, gooier texture.
Another common culprit that causes tough Rice Krispie Treats is over mixing the cereal treats or packing the mixture too firmly into the pan. Fold and press gently to keep the bars soft and chewy.

What makes bakery-style Rice Krispie Treats so soft and gooey?
Bakery-style Rice Krispie Treat recipes usually contain:
- Fresh, not stale, name brand ingredients
- Lots of butter
- Extra marshmallows
- Vanilla extract
- A pinch of salt
- Gentle folding of the ingredients, not stirring
Those small changes create treats that stay soft for days instead of becoming dry and crumbly after a few hours.
Can I use regular marshmallows instead of mini marshmallows?
Short answer, yes! Mini marshmallows melt more quickly and evenly, but regular sized or jumbo sized marshmallows work well. However, if using large marshmallows, we recommend cutting them in half or even quarters and allowing a little extra melting time while stirring gently over low heat.

How do I keep Rice Krispie Treats soft?
Store them in an airtight container at room temperature.
Avoid refrigeration, as cold air causes the marshmallow mixture to firm up and lose its signature soft, chewy texture.
Can I make Rice Krispie Treats ahead of time?
Yes! They’re a fantastic make-ahead desserts for parties. Prepare cereal treats up to 2–3 days in advance, cover tightly, and store at room temperature.
Can kids help make this recipe?
Of course! Since there’s no baking involved, this is a great beginner recipe for children to help make. Children can help measure ingredients, stir the cereal into the marshmallow mixture and gently spread it into the pan.
With that said, as always when baking or cooking with young children, adult supervision around hot pans and stove tops is recommended.
Can I freeze Rice Krispie Treats?
While technically, yes you can freeze Rice Krispie Treats, it will affect the texture.
If you do wish to freeze them, allow the cereal treats to cool completely. Slice cooled treats into squares and wrap individual squares tightly in plastic wrap before placing them in a freezer-safe zip top baggie or container. If stored correctly, prepared Rice Krispie Treats can be frozen for up to 6 weeks.
When ready to serve, let the frozen treats thaw at room temperature for about 30 minutes before eating.

Expert Tips for Perfect Bakery-Style Rice Krispie Treats
After years of making this classic dessert, I’ve discovered that a few simple techniques make all the difference.
1. Use Fresh Name Brand Marshmallows
I don’t always recommend name brand products and ingredients, but when it comes to Rice Krispie treats, name brand matters. Also, using fresh marshmallows is key, as they melt more easily and stay creamy. Older marshmallows often become dry and stale and don’t create the same gooey texture.
2. Fresh Name Brand Cereal Matters
Again, the name brand Rice Krispie Cereal, in my opinion, has a better texture than some store brands. Also, just like the marshmallows, an open box of cereal that’s been sitting in the pantry for weeks can become stale. A fresh, never opened box of Rice Krispies provides the crisp texture that makes these treats irresistible.
3. Add Extra Marshmallows and Butter
Our go to homemade Rice Krispie Treat recipe calls for more butter and marshmallows than the classic back of the box recipe. Not only do we melt more marshmallows into the butter mixture at the beginning, we find stirring extra marshmallows in at the same time as the cereal helps give the treats that beloved soft and gooey texture. And a little extra butter never hurts!

4. Cook Low and Slow
Allow the butter to melt completely on low heat before adding the marshmallows.
When adding the marshmallows, watch closely and stir gently, but consistently, over low heat to prevent burning. The marshmallows don’t need to be boiling, they should just be barely melted when you remove the marshmallows from the heat to stir in the cereal.
5. Fold Gently
After adding the cereal and extra marshmallows to the pot, gently fold everything together. Overmixing crushes the cereal and creates dense treats.
6. Press Lightly
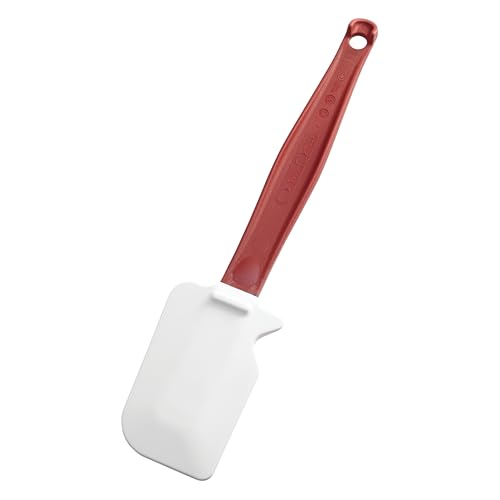
Once the cereal and marshmallow mixture is mixed together, spray your hands or a rubber spatula with canola oil or avocado oil cooking spray and gently press the cereal mixture into a well sprayed pan. Just like overmixing can cause hard, dense cereal treats, so can over-pressing. The lighter you press, the softer your Rice Krispie Treats will be.

How to store Rice Krispie Treats:
Homemade Rice Krispie Treats are best enjoyed in the first 1-2 days of making. However, they cab be stored in an airtight container for up to 3-4 days.
If you like this no bake dessert recipe, then you will love these other recipes:
- Salted Brown Butter Biscoff Rice Krispie Treats
- Strawberry Rice Krispie Treats
- Key Lime Pie Rice Krispie Treats

For more recipes, cooking tips and behind the scenes fun, subscribe to our newsletter or follow Kitchen Concoctions on Instagram, Facebook and Pinterest!


S'mores Rice Krispie Treats
These extra gooey bakery style S’mores Rice Krispie Treats are the ultimate no-bake summer dessert recipe - perfect for every occasion!
Ingredients
- Avocado oil or canola oil cooking spray, as needed
- 3 cups crispy rice cereal
- 1/2 cup coarsely broken graham crackers (plus more for topping)
- 5 tablespoons unsalted butter
- 6 cups fresh mini marshmallows, divided*
- 1 teaspoon pure vanilla extract
- ¼ teaspoon Kosher salt
- ½ cup semi-sweet chocolate chips
- 3-4 fun size milk chocolate Hershey Bars
Instructions
- Generously spray an 8x8-inch baking dish with non-stick cooking spray. Set aside.
- In a medium sized bowl, stir together crispy rice cereal, broken graham crackers and 1 cup mini marshmallows. Set aside.
- Spray the inside of a large heavy duty pot with cooking spray. This will help prevent the marshmallows from sticking to the sides as the melt.
- Add the butter to the pot and cook over medium-low heat, stirring constantly, until the butter begins to boil up and becomes foamy. Continue cooking and stirring until butter starts to smell nutty and turn golden brown in color, about 6-8 minutes. Note: Watch butter carefully so that it doesn’t turn dark brown or black and burn.
- Spray a rubber spatula with cooking spray and once butter has melted and turned brown, stir in 5 cups of marshmallows. Continue cooking over low heat, stirring constantly, until marshmallows are melted.
- Remove marshmallow mixture from heat and stir in vanilla and salt.
- Carefully fold in cereal, broken graham crackers and remaining 1 cup marshmallows, folding just until combined. Note: It is ok if the additional marshmallows only partially melt.
- Carefully fold in the chocolate chips.
- Using a rubber spatula, sprayed with non-stick cooking spray, carefully spread and lightly press the marshmallow covered cereal evenly into the prepared 8x8-inch baking dish.
- Immediately top as desired with chopped Hershey chocolate bars, additional broken graham crackers and marshmallows*, pressing the toppings into the cereal treats.
- Allow cereal treats to sit for 15-30 minutes before slicing into bars. Store cereal treats in an air tight container for 3-4 days.
Notes
*If desired, use a kitchen torch to carefully toast a few mini marshmallows once pressed into the top of the cereal treats.
PLEASE SEE THE "HELPFUL TIPS AND INFORMATION" SECTION ABOVE FOR ADDITIONAL RECIPE NOTES.
Recommended Products
As an Amazon Associate and member of other affiliate programs, I earn from qualifying purchases.



These look so good!